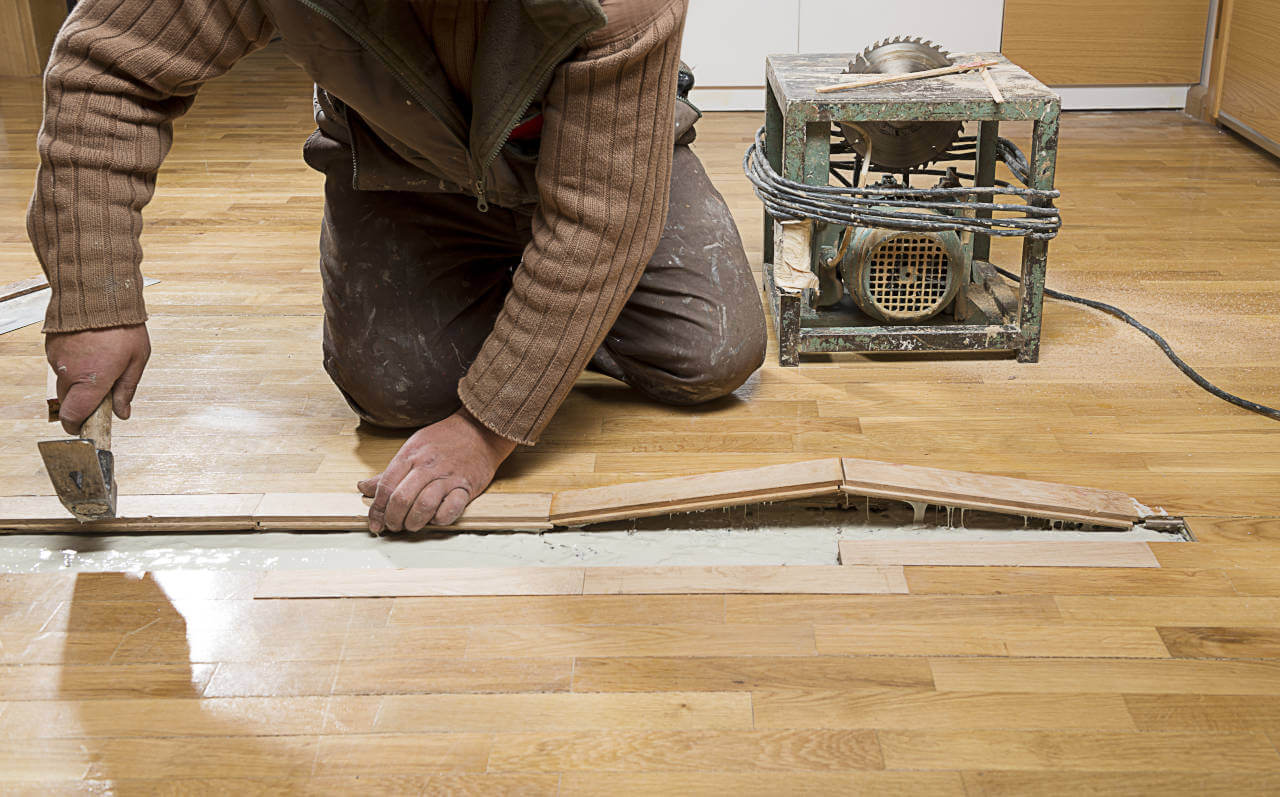
Flooring Restoration
We can restore your old flooring for you. This will be difficult if you do it alone. However, if you get help from an expert, it will be completed in a short time. We are here for you. Call us and get help by contacting an expert.
We are still writing the flooring restoration process for you.
Restoring Flooring
In older homes, flooring is often hidden under carpet or linoleum, and this is revealed during restoration work or renovation work. If the boards are in good condition, it’s worth working on the floor. Remove old layers of paint, dirt and nails and apply a sealant. If you take care of it with a lot of love and patience, you’ll be surprised how wonderfully rustic and natural old wood can look. Read here how you can best renovate an old floor. We can do your flooring restoration works for you, don’t forget to contact us.
Things to Do Before You Begin Check the Material and Make Space for Yourself.
First clean the entire room and remove the baseboards on the floor. If possible, also remove the door sills or bottom stop bars on the doors. Keep these ledges and sills if they are still in good condition. Like tiles, they are renewable and reusable.
Clean upholstery from old carpet residue, dust, and protruding nails and screws. Check the material by touching the individual plates. Do the pieces come off the wood or are they brittle? Can you spot a pest infestation? Repair damaged areas and fix loose boards or replace floorboards one by one if very damaged.
Also check the infrastructure and consider whether it is worth installing soundproofing. With footfall sound insulation under your floorboards, you can sustainably reduce background noise in everyday life. While this may mean a little more effort when remodeling, it can offer a lot of comfort in the long run. Bottom heat insulation or underfloor heating installation should also be considered. On the ground floor, the thermal insulation of the floor can save a lot of heating energy and provide a pleasant air conditioning. Underfloor heating is only conditionally suitable for use under one floor. If you are interested, you can ask our specialist company if this is possible for your project. We are always here for you as Leader Flooring.

Is There Still Enough Wear Layer?
Try to loosen one of the boards gently to determine the wear layer thickness. Is there still enough material to carry out the necessary sanding operations? The wear layer on modern floorboards is usually only 3 to 4 mm. In older solid floorboards, the wear layer can be significantly thicker, up to 10 mm. You can see the thickness of the wear layer from the cross section – it has a different color than the base layer and is usually very easy to identify. A wear layer of at least 3 mm should be left for grinding.
Even if modern angle grinders are equipped with a suction system, there can be a high level of dust exposure while working. Therefore, close unnecessary windows and doors, and also turn off sockets, wiring and switches. This will save you time with the final cleaning later. Consider also appropriate occupational health and safety when grinding. Wear a dust mask and safety glasses and protective gloves.
Before you start sanding, vacuum the entire room thoroughly again. This protects your grinding machine and the sandpaper, because sand, metal parts and chips that remain on the floor reduce the efficiency of the machine. Call us if you need a specialist for Flooring Restoration.
Remove Flooring
It is best to start with sanding in front of the window and move towards the direction of the light. Be sure to always sand in the longitudinal direction of the tiles. Move the grinder as evenly and continuously as possible. If you keep the machine in one place for a long time or change the direction of the sanding motion, sand the nicks in the boards. These indentations may be difficult or impossible to remove later on. Not only do they look attractive, they also create collection points for dirt, water or cleaning agent residues.
If there is still a layer of old paint on the floors, repeated sanding may be required. Use different grades of sandpaper for this. Start with coarse 80 grit and continue sanding with 100 and 120 grit. Grain size 240 is suitable for final polishing. Always replace the sandpaper whenever you notice that the sanding performance has deteriorated. Some old paint residue is very difficult to remove and tends to stick to sandpaper. Here it may be easier to burn off the old paint with a hot air gun. Test this out of sight. If you decide to burn, be sure to ventilate well and protect your respiratory system and eyes. The resulting vapors can be harmful to health.
The edge and corner sander are suitable for corners and edge areas in the room. Also use it to go over areas that will later be covered by skirting boards to ensure even and smooth guiding of the sander.
Repair Damaged Areas
Damaged areas in the wood are clearly visible after the final sanding. Touch up small areas with a mixture of wood glue and sanding powder or ready-made putty. Re-glue the twig pieces if they are loose. If all the plates are bent, check the room humidity. If it’s too wet, you should let it dry before trying to straighten it. If bent wood cannot be fixed with screws or nails, it is best to replace it. Small bumps can now be easily identified and sanded down. Also, touch up gouges and scratches by filling with putty or sanding.
When everything is ready, wait for the repair places to dry well. Then vacuum the floor thoroughly and wipe with a slightly damp cloth. Carefully remove the sanding dust so that it does not interfere with the glass later. After wiping, allow the room to dry for a short while before starting to treat the floorboards. If these processes are difficult for you, don’t worry, Leader Flooring can do all your restoration work for you.
What Coating Should the Plates Have?
In order for refurbished floors to maintain their new and beautiful appearance for a long time, a topcoat with varnish, oil or wax is suitable. It has the advantage of being very robust with this process. The trim seals super tightly and takes on a beautiful shine. Due to the varnish, it is very easy to care for, but it loses a little of its natural shine.
If you just want to oil your floors, this is a very simple and natural solution. This allows the flooring to continue to breathe and thus supports a healthy indoor climate. But oiled tiled floors require more intensive care. A smart alternative is hard oils or hard wax. These coatings also provide a breathable surface that is much easier to maintain than an oiled flooring surface. Apply the varnish, oil or lacquer evenly in one or two thin coats. Be careful not to paint too thickly. Two thin, even coats are better than one thick coat, which can be uneven.
Be Careful and Patient While Drying
Allow the coating to dry and never press the surface too quickly. An exception is coating with oil or hard oil. After about 20 minutes, wipe off excess oil with a cloth or carefully spread over the surface. Generally, a hard oil layer needs 24 hours to be polished. The finished sealed wood floor should not come into contact with water at first. Wait at least a week before mopping for the first time.
Post Processing and Finishing
Final polishing gives the hard oil and polish a beautiful shine. The longer you allow the sealer to dry, the more pliable the layers will be later on. Polish the floor before reinstalling the baseboards and door sill.
Renovate old baseboards and sills, such as flooring, before reinstalling them. Sand off the old paint and seal the surfaces with the same varnish as the boards. If the old strips are no longer usable, get new material. Glue the strips to the soles all around and secure with nails, dowels, glue or practical mounting clips. Seal the connections with acrylic sealant. This material paints well and provides some flexibility.
Perform Regular Maintenance with The Right Tools
Regular maintenance is important for your flooring to maintain its beautiful appearance for a long time. If its surface is covered with varnish, you can simply sweep, sweep and wipe the floor. Special care products are not required. After a while the paint may wear off partially and may need to be renewed later. This is only possible with pre-grinding.
Always vacuum or sweep oiled floors dry first. You can then thoroughly clean the floors with wood floor soap. Wood floor soap contains coconut or soybean oils that naturally clean and re-lubricate floors. A refresh is required at regular intervals. This is a wood floor soap with an oil content. Alternatively, you can apply the originally applied oil in a very thin layer and let it soak.
Over time, a gray haze can form on a waxed flooring. It is also possible to treat the dirt to the relatively soft wax layer. To clean such a floor again, you must remove the polish layer with an intense cleaner. Then reapply the polish, polish and you can enjoy a naturally beautiful floorboard for a long time.
Your Floor Restoration Works Are Now Safe
If you are having a hard time doing flooring restoration in your home, we have good news for you. We, as Leader Flooring, assist you in your restoration work.
With our fully professional team, we carry out the operations we have explained in a short time. You can have this quality flooring restoration job at the most affordable prices. Call us now and contact us.

